Testing analytics on iOS with XCTest
Overview
Have you ever pushed a release where you accidentally removed some of your analytics logging code or just forgot to add it in the first place? In this post I’ll be sharing two techniques for testing analytics in an iOS App to help you avoid these unfortunate scenarios.
To clarify what I mean by analytics, I’m talking about tools like GoogleAnalytics that provide you with insights on how users use your app. For example, which are the most and least used screens. This can help inform you where to focus your development efforts.
Concepts
Unit Testing
Unit testing can easily be achieved if your app adopts an MVVM architecture.
The concept is simple, we can move the analytics logging to our ViewModel. This is perhaps questionable move, as analytics logging usually takes place at the UI level. It’s worth considering either way for the benefits of testing.
Being a model, the ViewModel can easily be tested without relying on the simulator or being in a view hierarchy. Testing can commence in the usual manner, we can provide the ViewModel with a mock version of our analytics logger and verify the appropriate calls are made.
In summary:
- Create a
ViewModeland pass inMockAnalyticsinstead of the real implementation - Perform the appropriate actions on the
ViewModel(that would have originated from button taps when bound with aViewController) - Validate
MockAnalyticsis called with appropriate events
UI Testing
An alternate or additional method of testing can involve ui testing. This ensures the UI elements are hooked up appropriately (see my previous post for more examples on this method).
Now the challenge here is, currently there is no direct way to communicate between the main app and the ui test target other than through the UI. With that limitation in mind, here’s a solution I found. The UI Tests can inspect elements, hidden or otherwise on screen and read their accessibility information. As such, an invisible view can be added (during testing) which can have it’s accessibilityValue updated each time we log any analytics.
As such testing can be conducted in the following manner:
- Tap a button
- Verify the
accessibilityValueof our special view has been updated accordingly - Repeat for all the elements of interest
That’s pretty much it! The following section goes into the details of both concepts using a demo app.
Detailed Examples
Demo App
To demo both techniques, we’ll use a simple App with a single login screen:
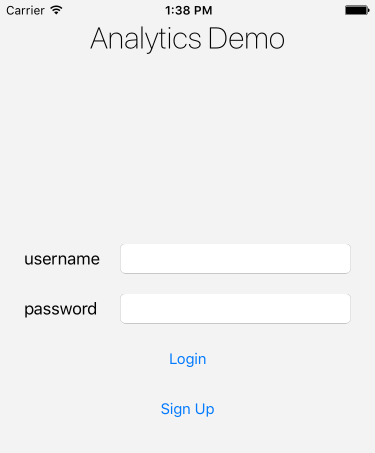
For our analytics requirements we want to log the following events:
- When the screen is viewed
- When users tap the Login button
- When users tap the Sign Up button
Unit Testing
Abstracting Analytics
First, let’s ensure we have a protocol for our Analytics so that we can easily replace implementations
protocol Analytics {
    func log(screen screen: String)
    func log(event event: String, action: String)
}
For the purposes of this demo, the non-testing implementation will be a ConsoleAnalytics version. This of course can be replaced with any other implementation - one backed by GoogleAnalytics for example.
class ConsoleAnalytics: Analytics {
    func log(screen screen: String) {
        print("[analytics] screen view: \(screen)")
    }

    func log(event event: String, action: String) {
        print("[analytics] event: \(event) - action: \(action)")
    }
}
The ViewModel
Here’s a basic LoginViewModel that logs the appropriate analytics when it’s actions are performed:
struct LoginViewModel {
    let analytics: Analytics

    func wakeup() {
        analytics.log(screen: AnalyticsScreens.Login)
    }

    func login() {
        analytics.log(event: AnalyticsEvents.Login, action: AnalyticsActions.Tap)
    }

    func signup() {
        analytics.log(event: AnalyticsEvents.SignUp, action: AnalyticsActions.Tap)
    }
}
The ViewController
With the view model hooked up to our analytics, we can bind it to our LoginViewController.
I recommend looking up frameworks like SwiftBond and RxSwift, however for the purposes of this demo, they are not needed.
class LoginViewController: UIViewController {
    // MARK: Dependencies
    var viewModel: LoginViewModel?

    // MARK: UIViewController overrides
    override func viewDidAppear(animated: Bool) {
        super.viewDidAppear(animated)
        viewModel?.wakeup()
    }

    // MARK: - Actions
    @IBAction func didTapLogin(sender: UIButton) {
        viewModel?.login()
    }

    @IBAction func didTapSignUp(sender: UIButton) {
        viewModel?.signup()
    }
}
The LoginViewModel will need to be injected to the LoginViewController, an example of how to achieve this can be seen in the demo app on GitHub
Mock Analytics
Next we’ll need to create MockAnalytics that we can use in place of our ConsoleAnalytics for unit testing:
class MockAnalytics: Analytics {
    var didLogScreen: ((String) -> Void)?
    var didLogEvent: ((_ event: String, _ action: String) -> Void)?

    // MARK: - Analytics
    func log(screen: String) {
        didLogScreen?(screen)
    }

    func log(event: String, action: String) {
        didLogEvent?(event, action)
    }
}
Helpers
To make our testing more readable and streamlined, we can add a few helper methods:
class LoginViewModelTests: XCTestCase {

    var mockAnalytics: MockAnalytics!
    var viewModel: LoginViewModel!

    override func setUp() {
        super.setUp()

        mockAnalytics = MockAnalytics()
        viewModel = LoginViewModel(analytics: mockAnalytics)
    }

    // MARK: - Helpers

    func verifyAnalytics(screen: String, when block:(()->Void), line: UInt = #line, file: StaticString = #file) {

        // setup expectations
        let e = expectation(description: "screen view analytics should be logged")
        mockAnalytics.didLogScreen = { loggedScreen in
            e.fulfill()
            XCTAssertEqual(loggedScreen, screen, file: file, line: line)
        }

        // perform actions
        block()

        // wait for expectations
        waitForExpectations(timeout: 1) { error in
            if let _ = error {
                XCTFail("Failed to log screen view analytics", file: file, line: line)
            }
        }
    }

    func verifyAnalytics(event: String, action: String, when block:(()->Void), line: UInt = #line, file: StaticString = #file) {

        // setup expectations
        let e = expectation(description: "event analytics should be logged")
        mockAnalytics.didLogEvent = { loggedEvent, loggedAction in
            e.fulfill()
            XCTAssertEqual(loggedEvent, event, file: file, line: line)
            XCTAssertEqual(loggedAction, action, file: file, line: line)
        }

        // perform actions
        block()

        // wait for expectations
        waitForExpectations(timeout: 1) { error in
            if let _ = error {
                XCTFail("Failed to log event analytics", file: file, line: line)
            }
        }
    }
}
Thanks to @masilotti
for sharing his tips on how to get XCTest helper methods to display errors at the
correct line when a failure occurs!
The idea behind these helpers is to allow us to state which analytics we expect to occur when we perform an action within a closure.
Tests
Finally, our clean unit tests:
class LoginViewModelTests: XCTestCase {
    // ...

    // MARK: - Tests

    func testAnalytics() {

        verifyAnalytics(screen: AnalyticsScreens.Login, when: {
            viewModel.wakeup()
        })

        verifyAnalytics(event: AnalyticsEvents.Login, action: AnalyticsActions.Tap, when: {
            viewModel.login()
        })

        verifyAnalytics(event: AnalyticsEvents.SignUp, action: AnalyticsActions.Tap, when: {
            viewModel.signup()
        })
    }
    // ...
}
UI Testing
Abstracting Analytics
We have to follow the same steps we did when unit testing and ensure we have an Analytics protocol abstraction.
We can now make a dummy AnalyticsDebugger implementation which will be filled in later on:
class AnalyticsDebugger: Analytics {
    func log(screen screen: String) {
        //TODO:
    }

    func log(event event: String, action: String) {
        //TODO:
    }
}
With those implementations, our app delegate can be updated to swap out the appropriate implementation based on our current mode.
class AppDelegate: UIResponder, UIApplicationDelegate {

    var window: UIWindow?

    // MARK: -
    var analytics: Analytics!

    func setup() {
        let defaults = UserDefaults.standard
        let uiTesting = defaults.bool(forKey: "ui-testing")

        if uiTesting {
            analytics = AnalyticsDebugger()
        } else {
            analytics = ConsoleAnalytics()
        }
    }

    // MARK: - UIApplicationDelegate
    func application(_ application: UIApplication, didFinishLaunchingWithOptions launchOptions: [UIApplication.LaunchOptionsKey: Any]?) -> Bool {

        window = UIWindow(frame: UIScreen.main.bounds)

        setup()

        let storyboard = UIStoryboard(name: "Main", bundle: nil)

        let initialViewController = storyboard.instantiateInitialViewController() as! LoginViewController
        initialViewController.viewModel = LoginViewModel(analytics: analytics)

        self.window?.rootViewController = initialViewController
        self.window?.makeKeyAndVisible()

        return true
    }
    // ...
}
Analytics Debugger
Now we need to create our special debugView which will act as our bridge to the ui test target.
class AnalyticsDebugger: Analytics {
    lazy var debugView: UIView = {
        let view = UIView(frame: CGRect(x: 0, y:0, width: 1, height: 1))
        view.accessibilityIdentifier = TestingConstants.AnalyticsDebugger
        view.accessibilityValue = ""
        return view
    }()
    // ...
}
For it to be seen by the ui test target, it needs to be added to the view hierarchy.
The least obtrusive way to do this is to add it as a subview of our main window in the AppDelegate.
This can be achieved by updating our setup() method as follows:
class AppDelegate: UIResponder, UIApplicationDelegate {
    // ...
    func setup() {
        let defaults = UserDefaults.standard
        let uiTesting = defaults.bool(forKey: "ui-testing")

        if uiTesting {
            let analyticsDebugger = AnalyticsDebugger()
            window?.addSubview(analyticsDebugger.debugView)
            analytics = analyticsDebugger
        } else {
            analytics = ConsoleAnalytics()
        }
    }
    // ...
}
We can verify our setup works by doing a quick test:
class LoginTests: XCTestCase {
    var app: XCUIApplication!

    override func setUp() {
        super.setUp()

        app = XCUIApplication()
        launch(app)

        // In UI tests it is usually best to stop immediately when a failure occurs.
        continueAfterFailure = false
    }

    override func tearDown() {
        // Put teardown code here. This method is called after the invocation of each test method in the class.
        super.tearDown()
    }

    // MARK: - Helpers
    func launch(app: XCUIApplication) {
        app.launchArguments = ["-ui-testing", "YES"]
        app.launch()
    }

    // MARK: - Tests
    func testAnalyticsDebuggerExists() {
        let analyticsDebugger = app.otherElements[TestingConstants.AnalyticsDebugger]
        XCTAssertTrue(analyticsDebugger.exists)
    }
}
Analytics Coder
Great, we have built our pipeline, now it’s time to fill in some blanks. We need to a mechanism to encode and decode our analytics to and from a string as the accessibilityValue type is a string. A simple option is to encode an analytics entry or record to a json string and decode it on the other end.
We’ll need some generic structure to house these records:
enum AnalyticsRecordType: String, Codable {
    case screen
    case event
}

struct AnalyticsRecord: Codable, Equatable {
    let type: AnalyticsRecordType
    let identifier: String
    let data: String?
}
This of course can be customized to suit the nature of the analytics being tested. As for the encoding and decoding aspect, here’s a basic implementation we can use:
protocol AnalyticsCoder {
    func encode(_ records: [AnalyticsRecord]) -> String
    func decode(_ string: String) -> [AnalyticsRecord]
}

class JSONAnalyticsCoder: AnalyticsCoder {
    func encode(_ records: [AnalyticsRecord]) -> String {
        let jsonData = try? JSONEncoder().encode(records)
        let jsonString = jsonData.flatMap { String(data: $0, encoding: .utf8) }
        return jsonString ?? ""
    }

    func decode(_ string: String) -> [AnalyticsRecord] {
        let data = string.data(using: .utf8)
        let records = data.flatMap { try? JSONDecoder().decode([AnalyticsRecord].self, from: $0) }
        return records ?? []
    }
}
With our coder implementation completed, we can now update the AnalyticsDebugger:
class AnalyticsDebugger: Analytics {
    // ...

    private let encoder: AnalyticsCoder
    init(encoder: AnalyticsCoder) {
        self.encoder = encoder
    }

    // MARK: - Analytics
    func log(screen: String) {
        let record = AnalyticsRecord(type: .screen, identifier: screen, data: nil)
        log(record: record)
    }

    func log(event: String, action: String) {
        let record = AnalyticsRecord(type: .event, identifier: event, data: action)
        log(record: record)
    }

    // MARK: - Private
    private func log(record: AnalyticsRecord) {
        var records = encoder.decode(debugView.accessibilityValue ?? "")
        records.append(record)
        debugView.accessibilityValue = encoder.encode(records)
    }
}
Testing Helpers
We’re almost ready to write our tests, we just need to add some helper methods to allow us to extract and verify our analytics within the ui test target.
This can be improved, but will suffice for the purposes of this demo:
struct ItemOccurrence<T> {
    let item: T
    let occurs: Int
}

class AnalyticsTester {
    let app: XCUIApplication

    init(app: XCUIApplication) {
        self.app = app
    }

    func verify(count: Int,
                file: StaticString = #file,
                line: UInt = #line) {
        let records = extractAnalytics()
        XCTAssertEqual(records.count, count, file: file, line: line)
    }

    func verify(type occurrence: ItemOccurrence<AnalyticsRecordType>,
                file: StaticString = #file,
                line: UInt = #line) {
        let records = extractAnalytics()
        let matchingRecords = records.filter { $0.type.rawValue == occurrence.item.rawValue }
        XCTAssertEqual(matchingRecords.count, occurrence.occurs, file: file, line: line)
    }

    func verify(id occurrence: ItemOccurrence<String>,
                file: StaticString = #file,
                line: UInt = #line) {
        let records = extractAnalytics()
        let matchingRecords = records.filter { $0.identifier == occurrence.item }
        XCTAssertEqual(matchingRecords.count, occurrence.occurs, file: file, line: line)
    }

    func verify(data occurrence: ItemOccurrence<String>,
                file: StaticString = #file,
                line: UInt = #line) {
        let records = extractAnalytics()
        let matchingRecords = records.filter { $0.data == occurrence.item }
        XCTAssertEqual(matchingRecords.count, occurrence.occurs, file: file, line: line)
    }

    func verify(idAndData occurrence: ItemOccurrence<(id: String, data: String)>,
                file: StaticString = #file,
                line: UInt = #line) {
        let records = extractAnalytics()
        let matchingRecords = records.filter { $0.identifier == occurrence.item.id && $0.data == occurrence.item.data }
        XCTAssertEqual(matchingRecords.count, occurrence.occurs, file: file, line: line)
    }

    private func extractAnalytics() -> [AnalyticsRecord] {
        let analyticsDebugger = app.otherElements[TestingConstants.AnalyticsDebugger]
        let decoder = JSONAnalyticsCoder()
        return decoder.decode(analyticsDebugger.value as! String)
    }
}
These helper methods, allow scanning through the analytics records attached to the accessibilityValue of our debugView and verify
the appropriate occurrences took place. For example, we can verify a total of n analytics records are logged using verify(count: n) or we can drill in further and verify that out of these n records, m records are screen view analytics using
verify(type: ItemOccurrence(item: .screen, occurs: m)) etc…
The Tests
Finally, we can now write our tests!
class LoginTests: XCTestCase {
    // ...
     func testAnalytics() {

        // verify screen view is logged on load
        analyticsTester.verify(count: 1)
        analyticsTester.verify(type: ItemOccurrence(item: .screen, occurs: 1))
        analyticsTester.verify(id: ItemOccurrence(item: AnalyticsScreens.Login, occurs: 1))

        // tap the login button and verify the tap event is logged
        app.buttons[TestingConstants.LoginButton].tap()

        analyticsTester.verify(count: 2)
        analyticsTester.verify(type: ItemOccurrence(item: .event, occurs: 1))
        analyticsTester.verify(idAndData: ItemOccurrence(item: (AnalyticsEvents.Login, AnalyticsActions.Tap), occurs: 1))

        // tap the sign up button and verify the tap event is logged
        app.buttons[TestingConstants.SignUpButton].tap()

        analyticsTester.verify(count: 3)
        analyticsTester.verify(type: ItemOccurrence(item: .event, occurs: 2))
        analyticsTester.verify(idAndData: ItemOccurrence(item: (AnalyticsEvents.SignUp, AnalyticsActions.Tap), occurs: 1))
    }
    // ...
}
Final Thoughts
Adopting something like this requires the use of best practices like dependency injection and adding abstractions where appropriate.
In the demo I have a single screen so it was easy to inject the analytics and viewModel instances. Your app will of course be much larger and there are a few options out there on how to help out. Swinject is an example of a dependency injection framework for Swift apps that also supports injecting dependencies to UIViewController instances created by a UIStoryboard.
Testing analytics is important, especially if you base any business decisions on their results. The two techniques I outlined will certainly help ensure you are logging and propagating the appropriate events, however won’t be able to catch cases where the analytics framework itself fails to send data for example. Smoke testing before release is still needed, but at least you only need to verify one or two cases manually and rely on the tests for the rest.
Happy Testing!
Links
- Analytics testing demo app
- UI Testing with NSUserDefaults
- XCTest Helpers by @masilotti
- Dependency injection framework: Swinject
- Binding frameworks: SwiftBond & RxSwift
Edit: as of Xcode8 and iOS 10, elements need to have a non zero frame to be visible to the test target.
Update (25th-Nov-2018): Code snippets updated for Swift 4.2 syntax